How Speakybara works
Everything the app does, briefly. Read it top to bottom in ten minutes, or jump to what you need.
Speakybara works the same on Windows and on the Mac. Hotkeys are written here for Windows; on a Mac, Ctrl is Control (⌃) and Alt is Option (⌥). Anything that exists on only one of the two has a label. The pictures are from the Mac app; Windows has the same layout, in the style of Windows 11.
Getting started
Once started, Speakybara sits in the system tray (Windows) or the menu bar (Mac) and waits for a hotkey. You do not need an account.
- Install. Download the app and start it. The first time, Windows asks through SmartScreen whether you trust it, and on a Mac you open it once through System Settings › Privacy & Security. The download page walks you through both.
- Allow screen recording. At your first capture, macOS asks for Screen & System Audio Recording, so Speakybara can see the text in your frame. Turn it on under System Settings › Privacy & Security and then restart Speakybara; ticking the box alone is not enough.Mac only
- Your first capture. Press Ctrl+Alt+S, drag a frame over some text and press Enter. You hear the text straight away.
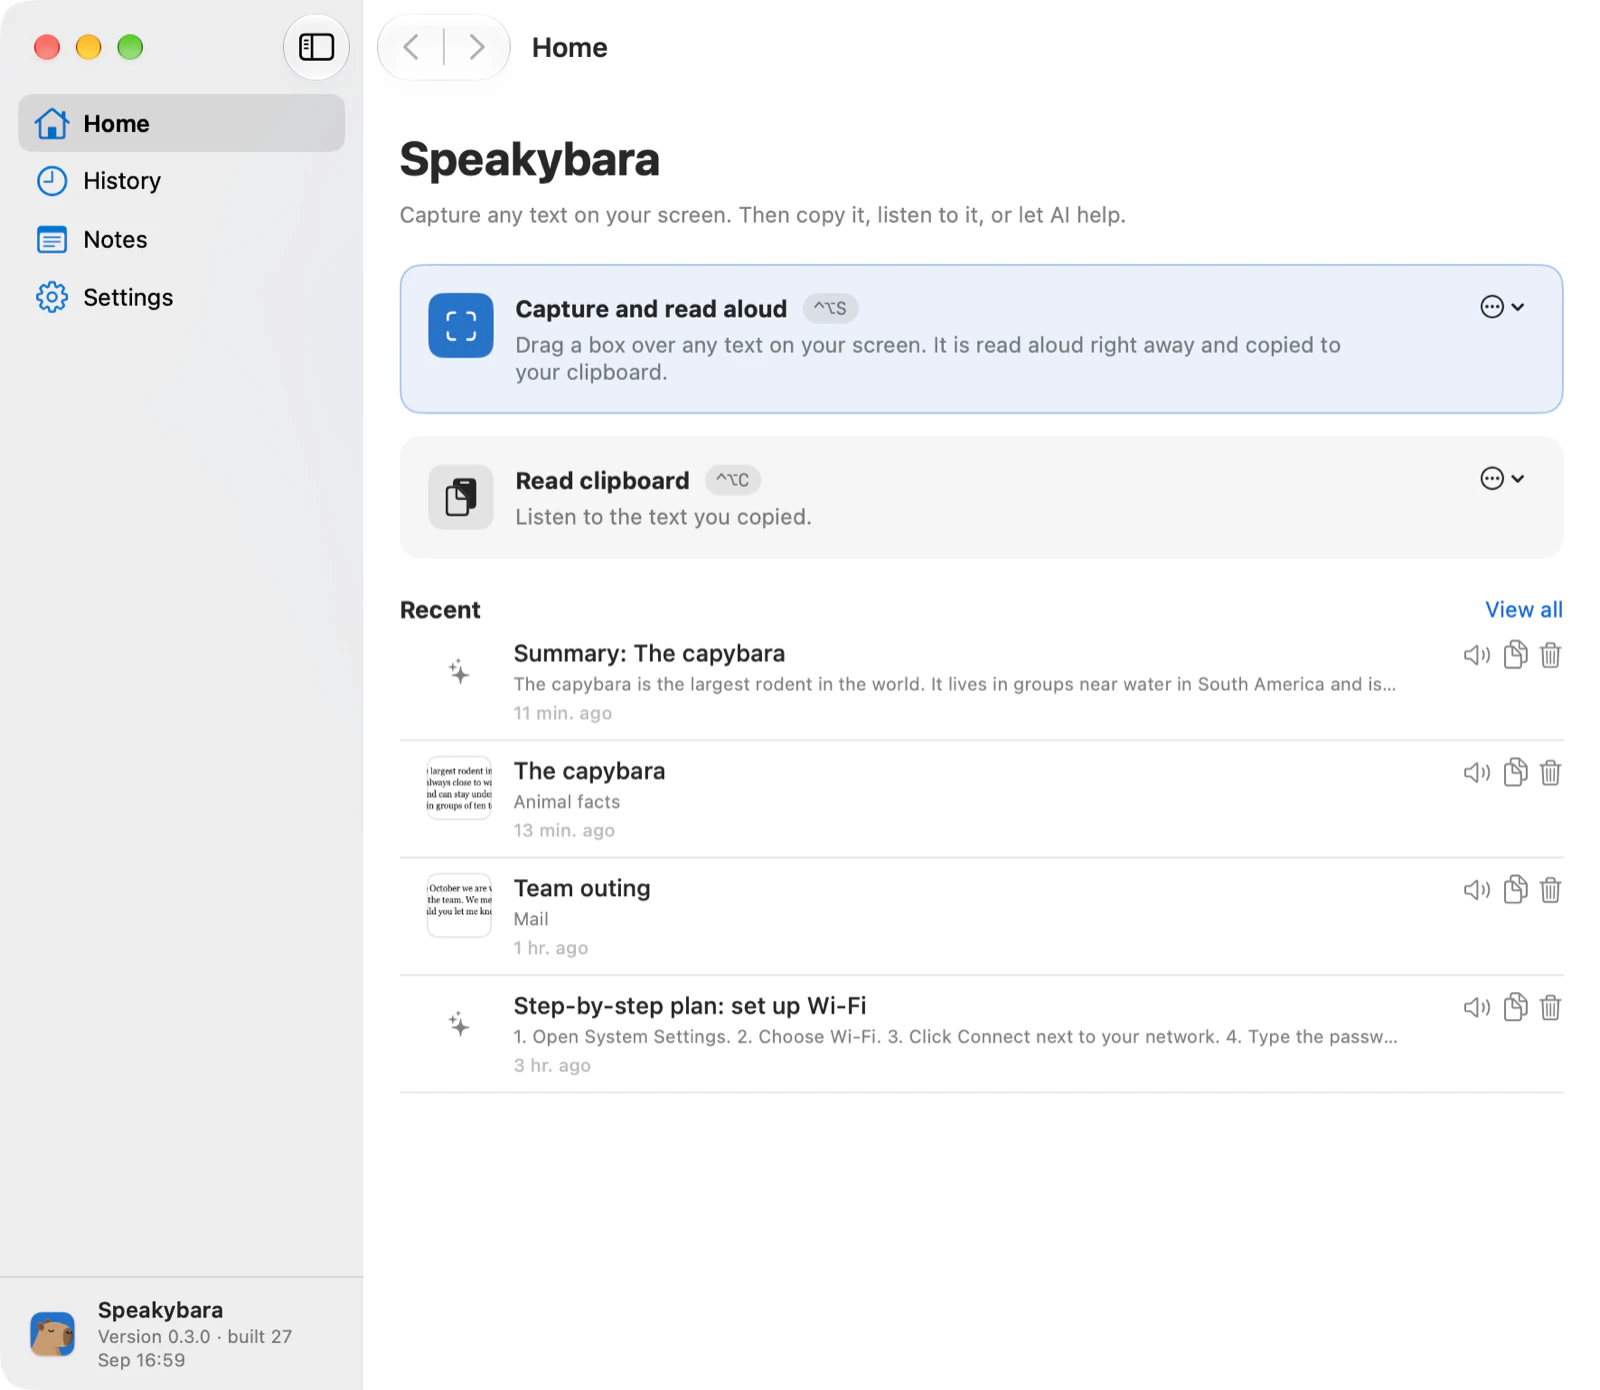
- The window. Home, History, Notes and Settings. Closing the window keeps Speakybara running; the icon brings it back.
- Start automatically. Settings › Startup: start with Windows or when you log in on the Mac, without opening the window. On a Mac you also choose there whether Speakybara shows in the Dock.
Text from your screen
A capture is a frame around part of the screen. Speakybara reads the text inside it with the text recognition built into Windows or macOS, on your own computer.
- Drag a frame. Press a capture hotkey and drag a frame. The screen holds still for a moment, so a video or animation cannot jump. Esc or the right mouse button cancels.
- The bar under the frame. The frame stays, and its handles let you adjust it. Enter does what the hotkey promised. The bar also offers Read aloud, Copy and a quick action, and under the three dots Only save, don't read aloud.
- Scrollshot. Scroll inside the frame to take more text than fits on the screen, up to 15 screens. The bar counts along, and if you skip a piece it asks you to scroll back a little.
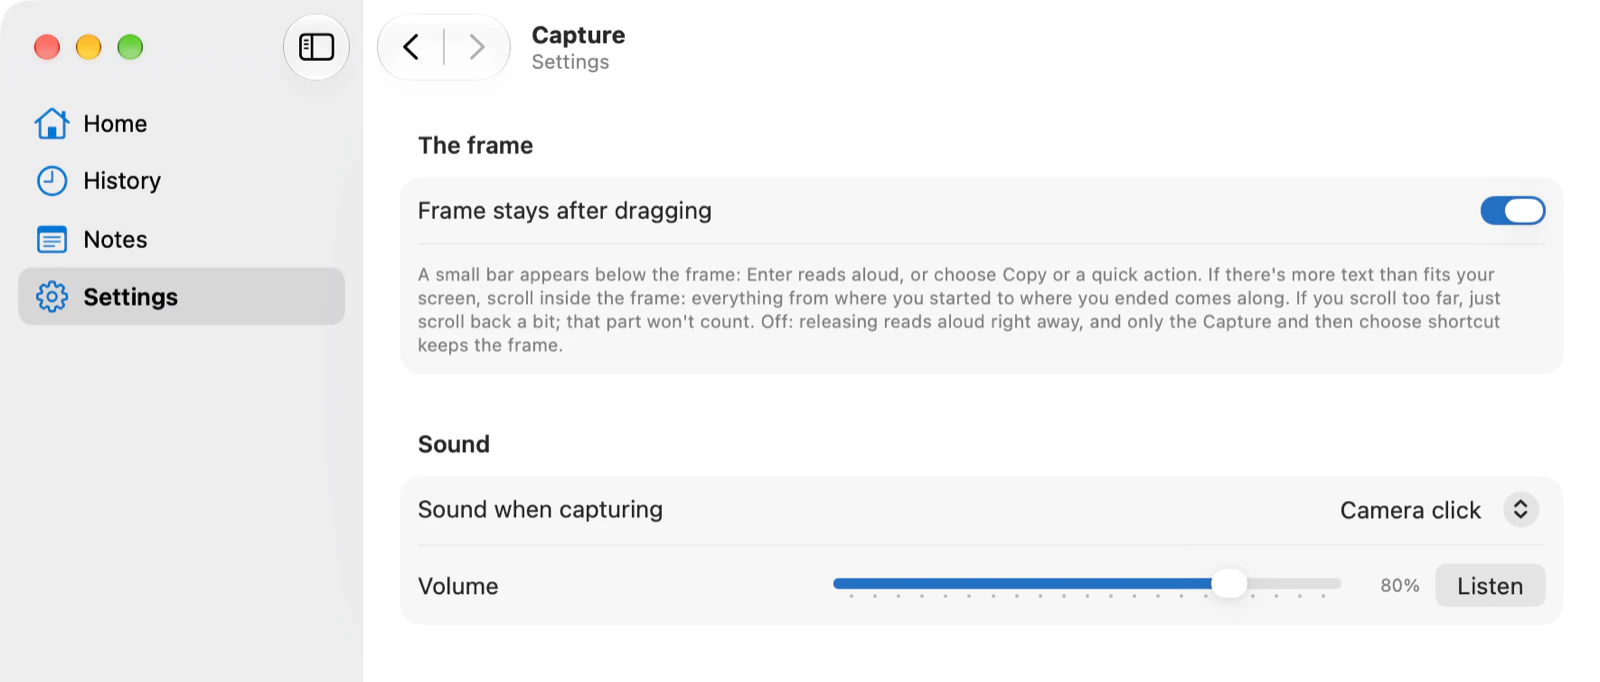
- Straight away on release. Turn off Settings › Capture › Frame stays after dragging, and letting go does what the hotkey promised at once, without Enter.
- Read the clipboard. Ctrl+Alt+C reads aloud whatever you copied. Handy for long texts, and for languages your computer cannot read from the screen.
- Sound. Settings › Capture: a camera click, a soft or sharp click, a chime, a file of your own or no sound, with its own volume.
While it reads
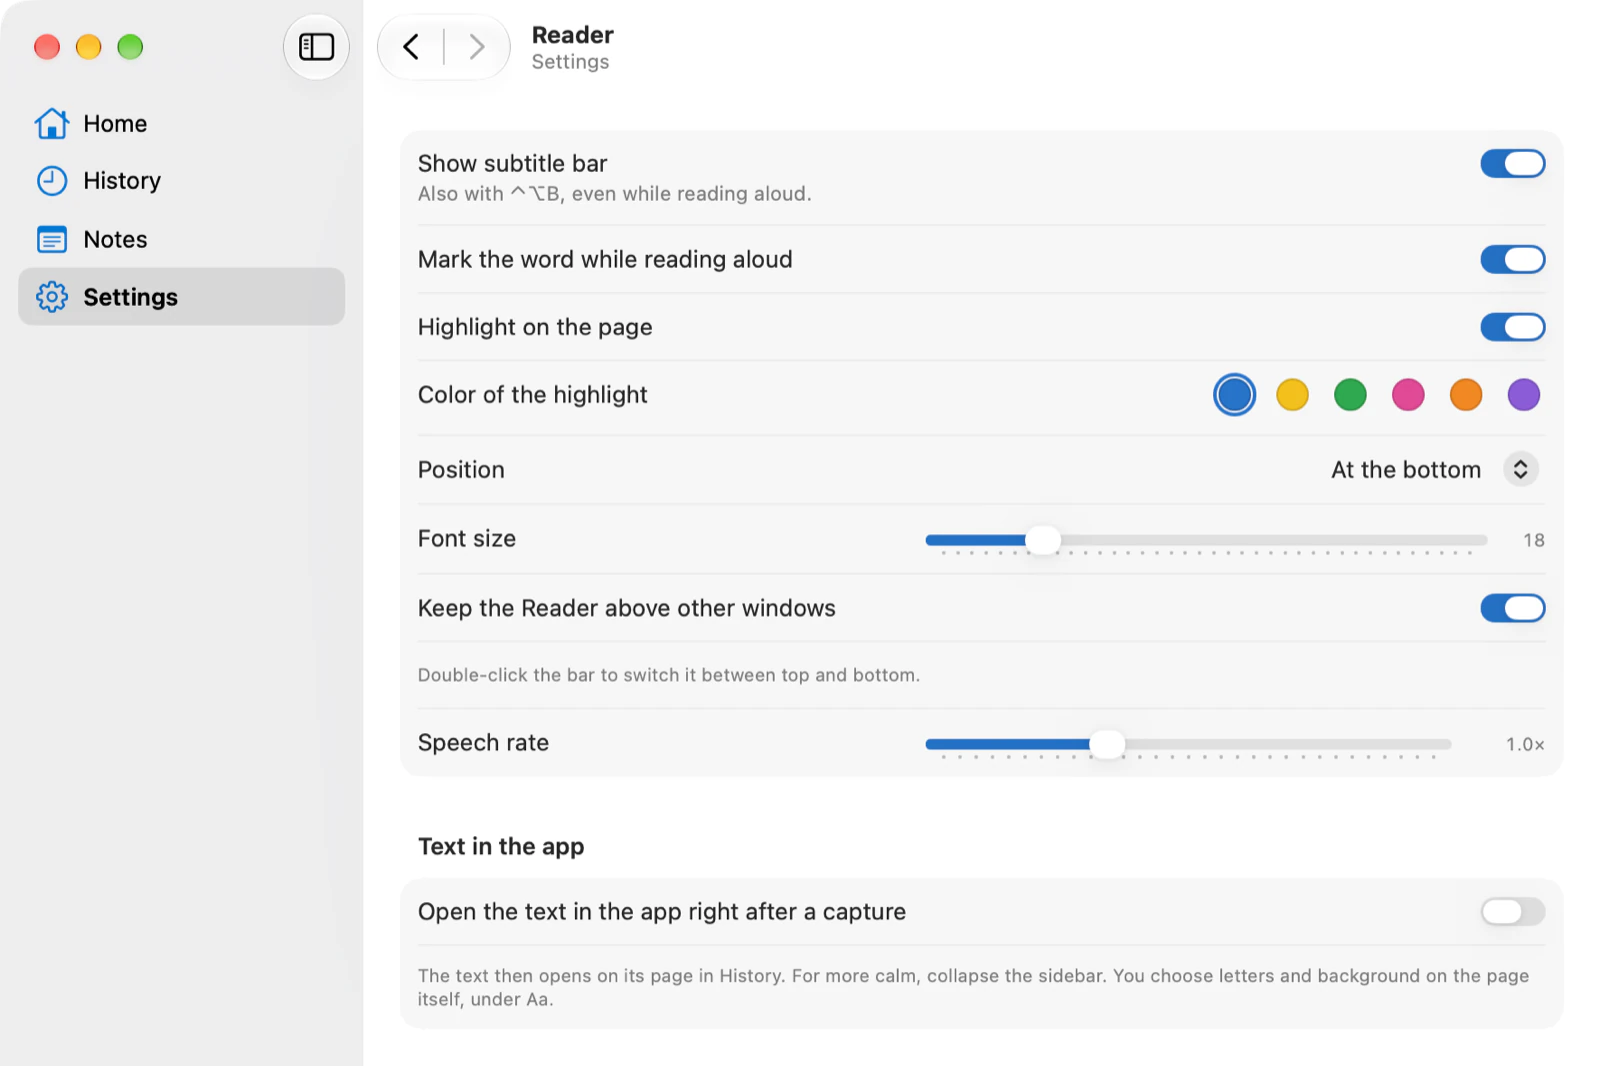
At the bottom of your screen the subtitle bar shows the sentence you hear, and in the text itself the word being read lights up.
- The subtitle bar. From left to right: speed (0.8× to 1.75×), 10 seconds back, play or pause, 10 seconds forward, the sentence, quick actions and close.
- Move the bar. Drag it wherever you like, pull a side to make it narrower or wider, or fold it to a single line. Double-clicking an empty spot puts it back; the right mouse button makes the text bigger or smaller.
- Follow along on the page. The word you hear lights up in the window the text came from. Click a sentence and reading continues there. Pick the colour under Settings › Read along.
- Look up a word. Click a word in the subtitle bar. Reading pauses and you hear what the word means in this sentence; Still not clear? explains it another way.
- Text on hold. Take a new capture while it reads, for instance to have something explained, and the text you were in waits. Close the new one and the old one carries on where it was.
- Bar or highlight off. Under Settings › Read along or in the icon's menu. On a Mac, Control+Option+B also turns the bar off and on in between.
- Copy from the bar. If the sentence contains a web address, an email address or a value, one click copies it. You can also select text in the bar to highlight, explain or copy it.Mac only
Hotkeys
They work everywhere, also when Speakybara is not in front.
| What | Windows | Mac |
|---|---|---|
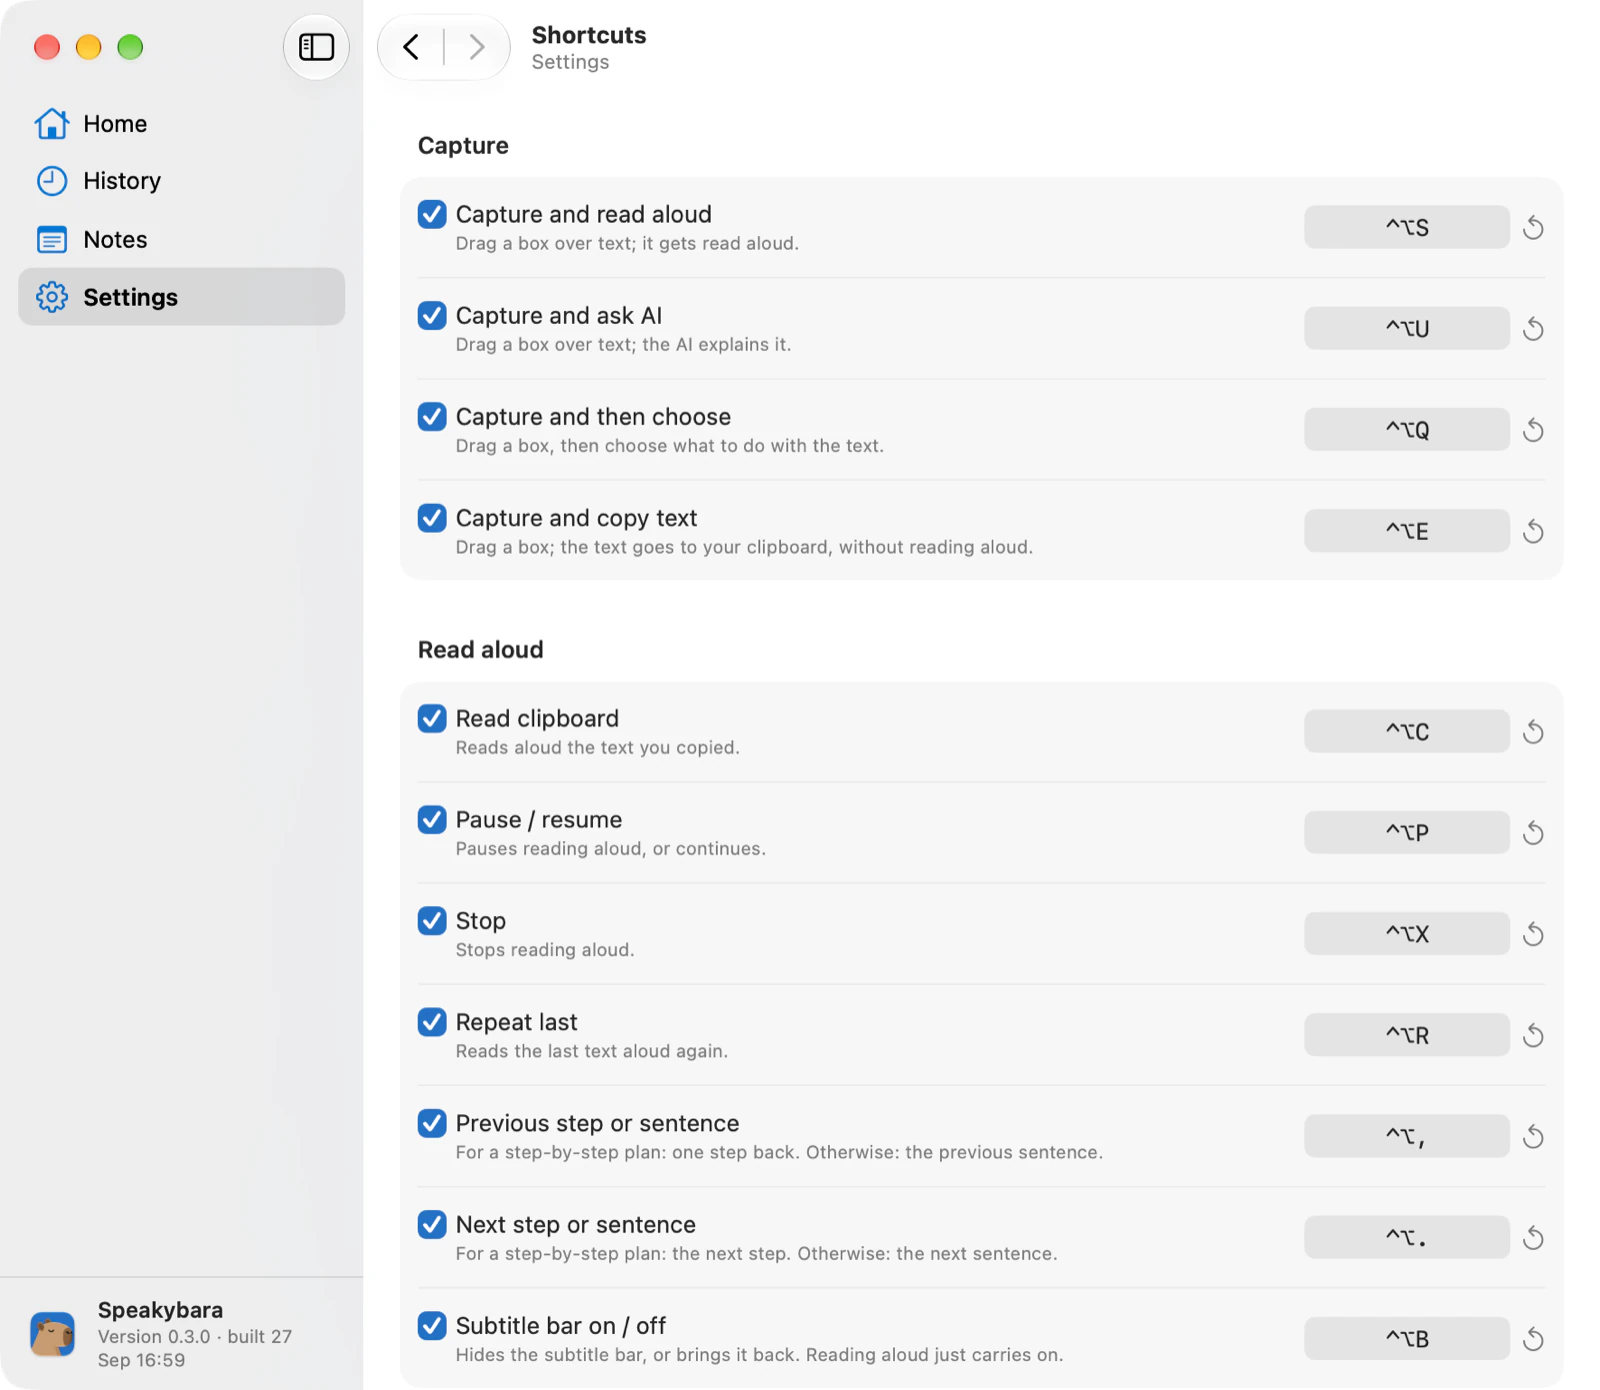
| Capture and read aloud | CtrlAltS | ⌃⌥S |
| Capture and copy text | CtrlAltE | ⌃⌥E |
| Capture and ask AI | CtrlAltU | ⌃⌥U |
| Capture and then choose | CtrlAltQ | ⌃⌥Q |
| Read clipboard | CtrlAltC | ⌃⌥C |
| Pause / resume | CtrlAltP | ⌃⌥P |
| Stop | CtrlAltX | ⌃⌥X |
| Repeat last | CtrlAltR | ⌃⌥R |
| Previous step or sentence | CtrlAlt, | ⌃⌥, |
| Next step or sentence | CtrlAlt. | ⌃⌥. |
| Subtitle bar on / off | — | ⌃⌥B |
| Focus on / off | CtrlAltF | — |
- Change them. Settings › Shortcuts: click a field and press the keys. If a combination is already taken, the app says so. The switch next to it turns a hotkey off.
- Your own actions. Every quick action you make yourself can have a hotkey of its own.
- On the reading page. Space pauses, the arrow keys go a sentence (or step) back or forward, M highlights and N adds a note.
History, notes and explanations
Whatever you read aloud or copy, Speakybara keeps in History, on your own computer only. Click a text to read it on the reading page.
- Search and filter. Search for a word, show only captures, clipboard or AI, and put the newest or the oldest first.
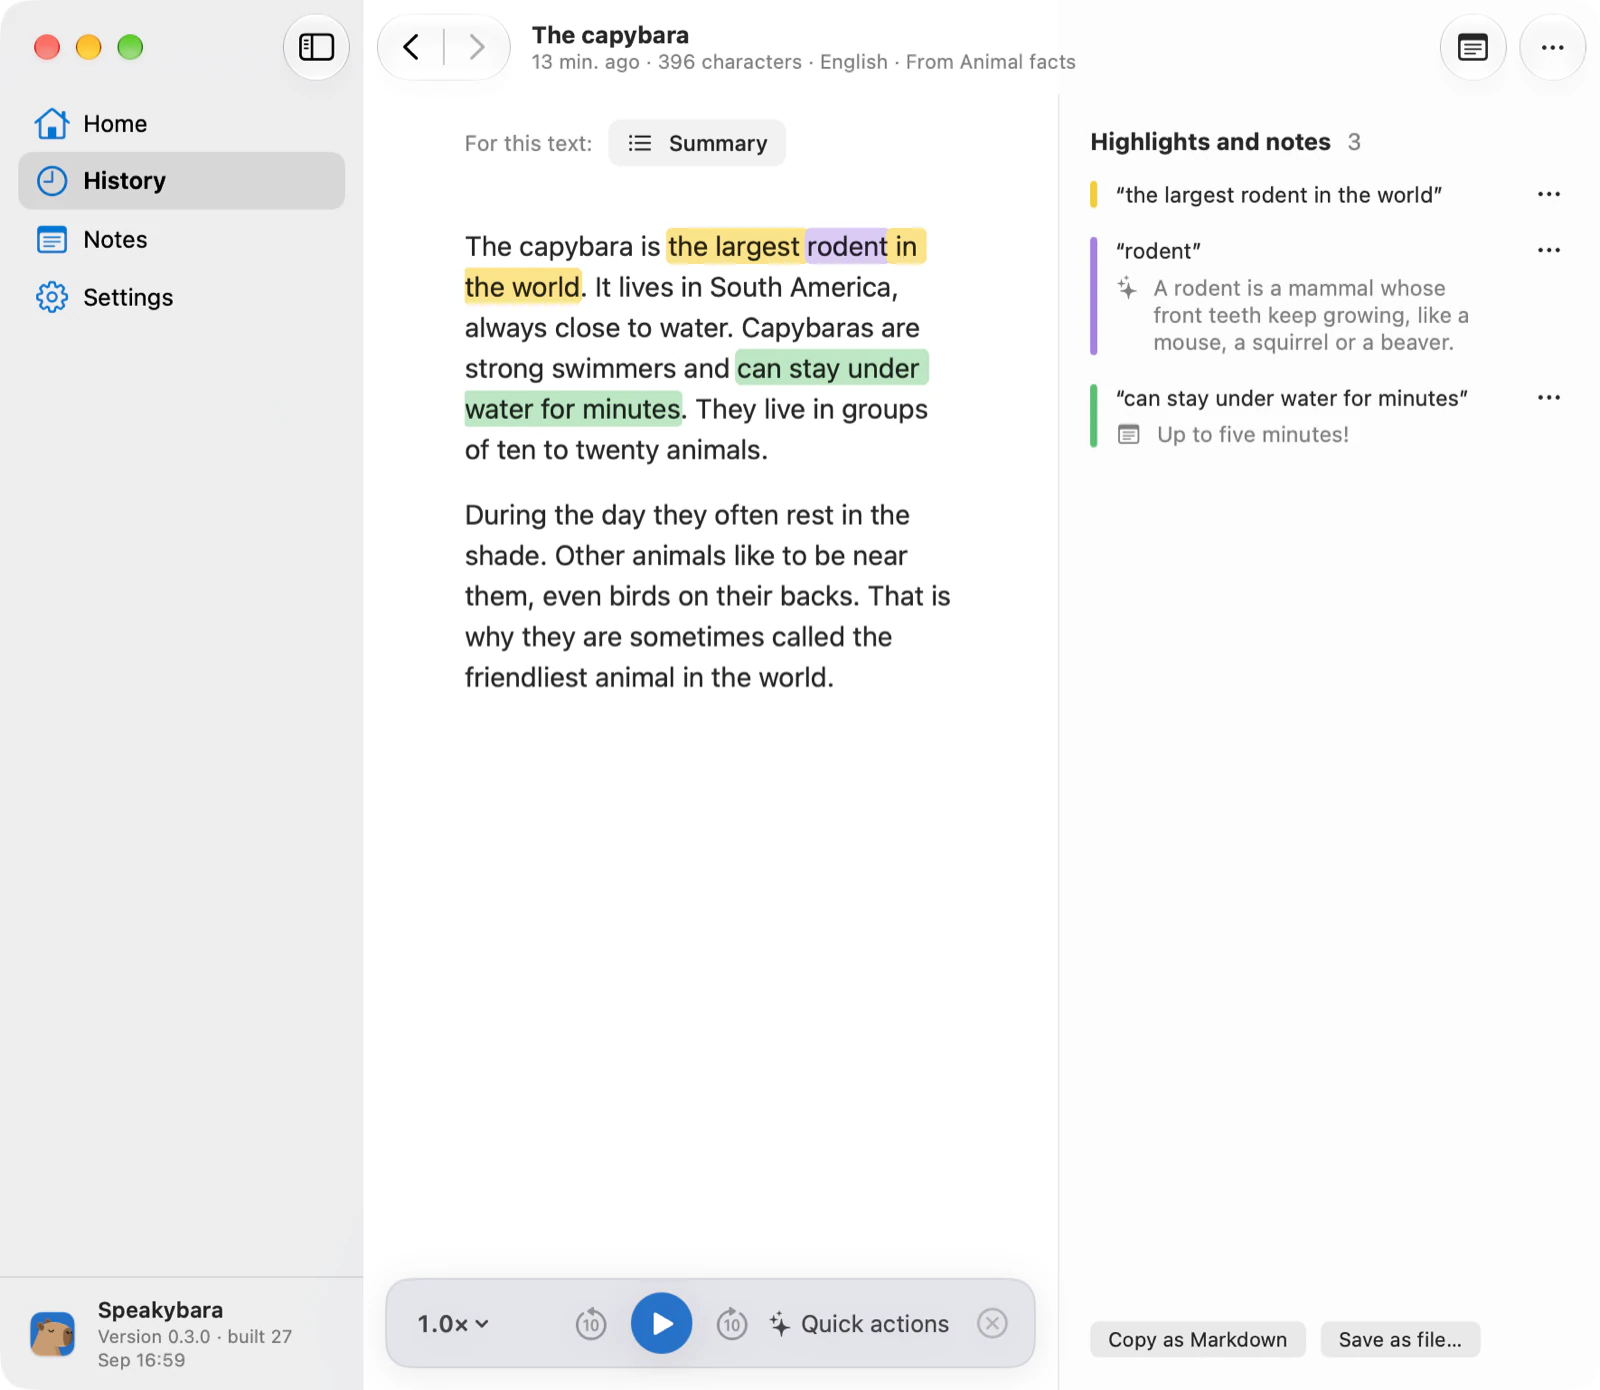
- The reading page. The whole text, large and calm, with the same controls as the subtitle bar at the bottom. Under the three dots: Copy the whole text, Appearance (text size, line spacing, light, sepia or dark), Show original and Delete.
- Select. As in a document: double-click for a word, triple-click for a paragraph. A small bar appears above the selection with highlight colours, Note, Explain, Read from here and Copy.
- Highlights and notes. Pick a colour or press M; Note or N adds a note. Click a highlight to change it or take it away.
- Explain. A single word gives its meaning in the sentence, which joins your looked-up words. A longer piece gives an explanation, saved as a note with that piece. Still not clear? asks further.
- The Notes page. All highlights, notes, saved explanations and looked-up words together, with search and a filter. Copy them as Markdown or save them as a file, for Obsidian for example.
- Keep or not. History can be turned off under Settings › History. A text with notes is always kept until you delete it yourself.
Quick actions and AI
A quick action has an AI do something with your text and reads the answer aloud. You connect that AI yourself under Settings › AI for tasks.
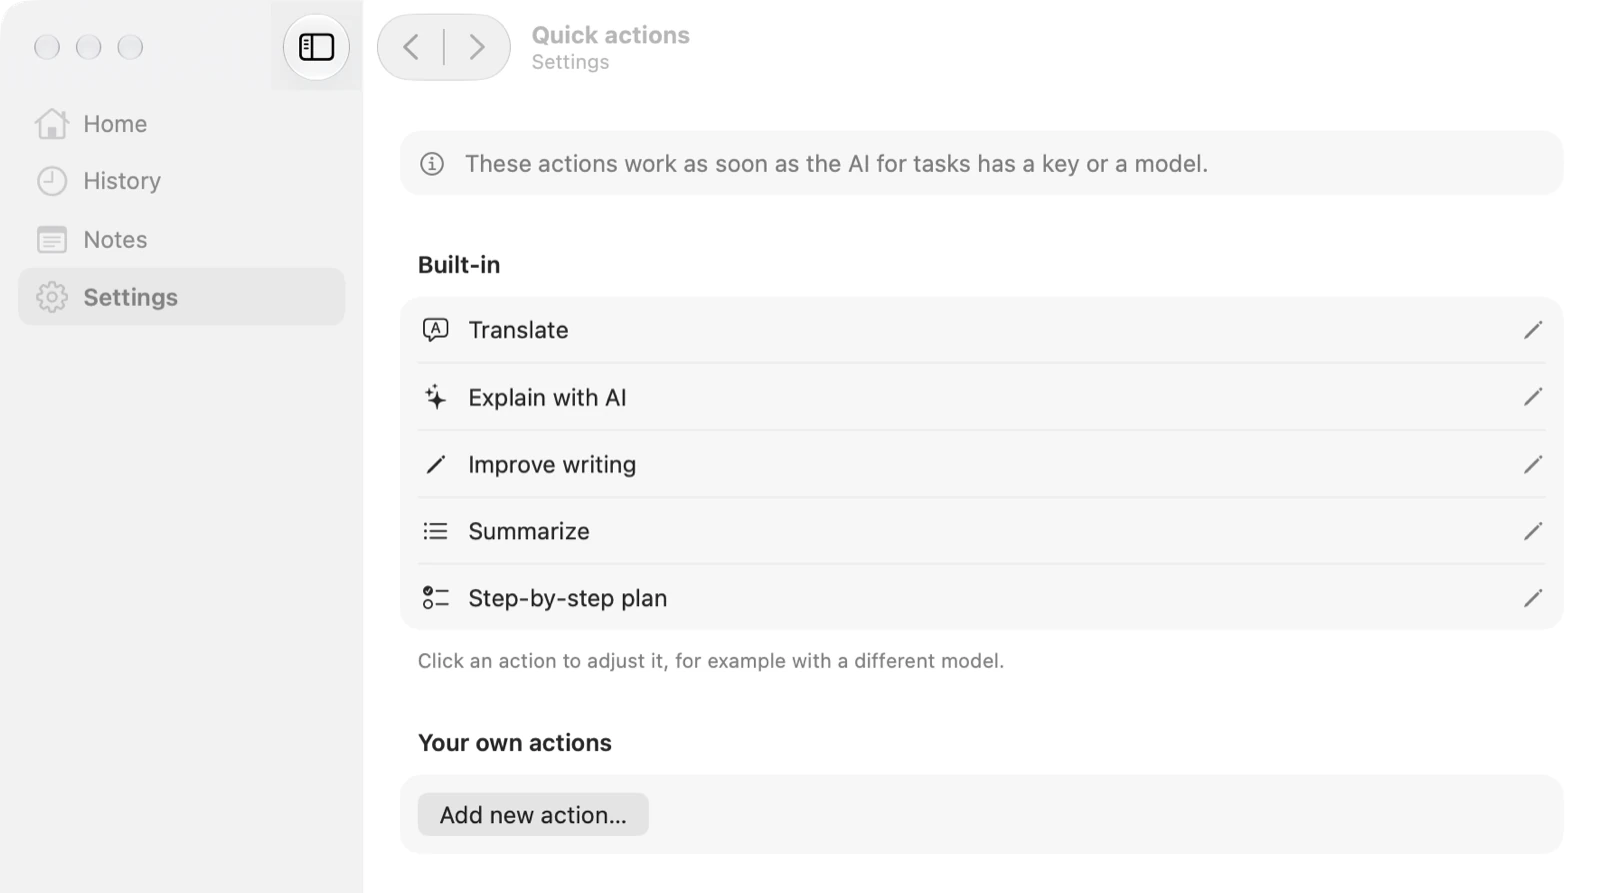
- Built in. Translate, Explain with AI, Improve writing, Summarize and Step-by-step plan. With Custom instruction… you ask your own question about the text.
- Where to find them. In the bar under the frame, behind the Quick actions button on the subtitle bar, at the bottom of the reading page and with the right mouse button on a text in History. Ctrl+Alt+U takes a capture and has the AI explain it: you hear the answer instead of the text. Under AI for tasks › More options you can make it Summarize.
- Connect an AI. A key of your own from OpenAI, Google Gemini or OpenRouter, or a model on your own computer through Ollama or LM Studio, for example. Test tells you whether it works; More options shows your usage and the estimated cost.
- Your own actions. Settings › AI for tasks › Quick actions › Manage: give it a name, an icon and an instruction, choose whether the answer is copied or read aloud, and give it a hotkey of its own. Advanced options set the answer language, the length and the model, among other things.
- Adjust the built-in actions. Under Manage, click a built-in action to change its instruction, AI service or model. Reset undoes it.Mac only
- AI off entirely. Turn AI for tasks off (Off on Windows, the switch at the top on a Mac) and nothing goes to an AI: no quick actions, no clean-up, no explanations. Your key stays saved.
Step by step
For instructions you carry out while you hear them, such as a manual or an installation.
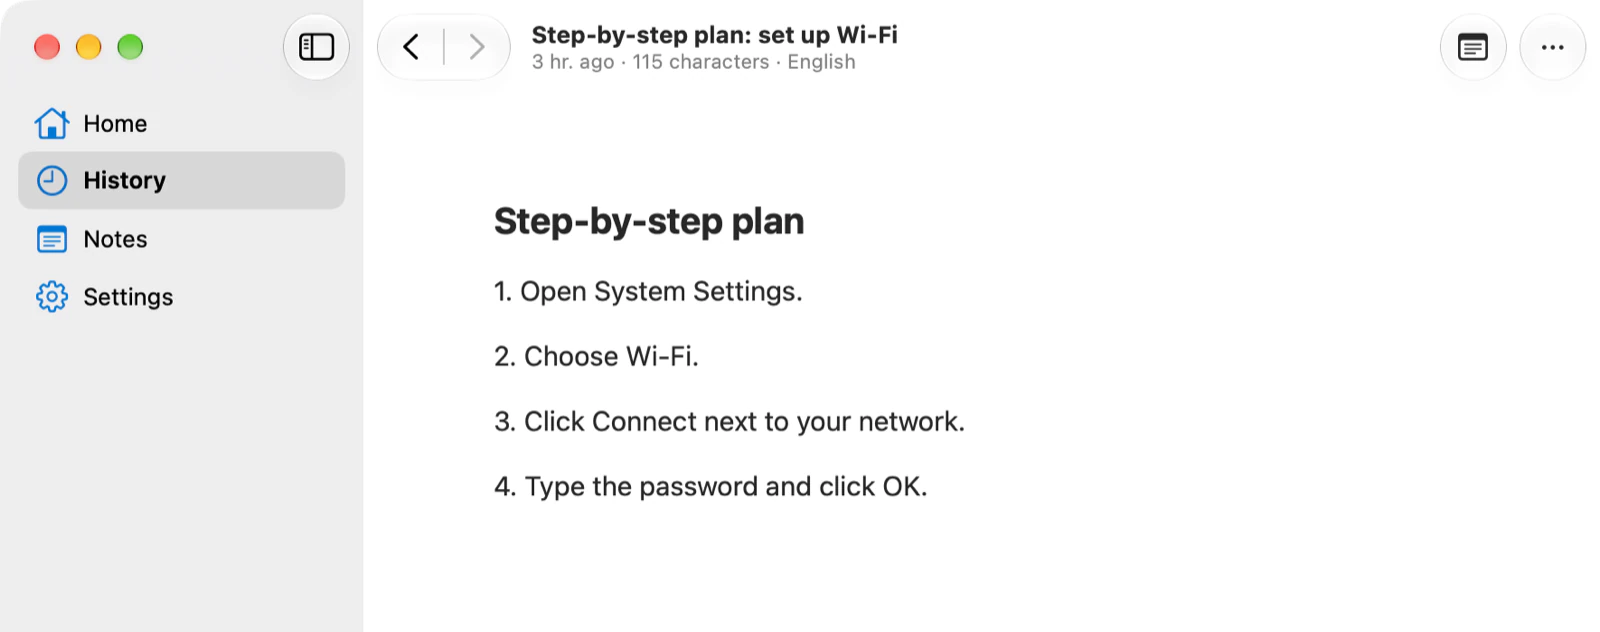
- Step-by-step plan. This quick action turns a text into numbered steps. After each step, reading waits, with Step 2 of 7 on the bar.
- Previous and next. With the buttons on the bar, or with Ctrl+Alt+, and Ctrl+Alt+. from any program.
- Explain a step. The Explanation button has the AI explain that one step in more detail. Still not clear? asks further.
- Let it look. Turn on Explanations may look at your screen under AI for tasks, and an explanation comes with a picture of your screen, so the AI can say where a button is. Off by default.
- Only when you ask. An ordinary text with a list in it never turns into a plan by itself. If a text has a list, Read step by step in the Quick actions menu on the bar turns it on.
Voices and pronunciation
Which voice reads, you choose per language under Settings › Voice.
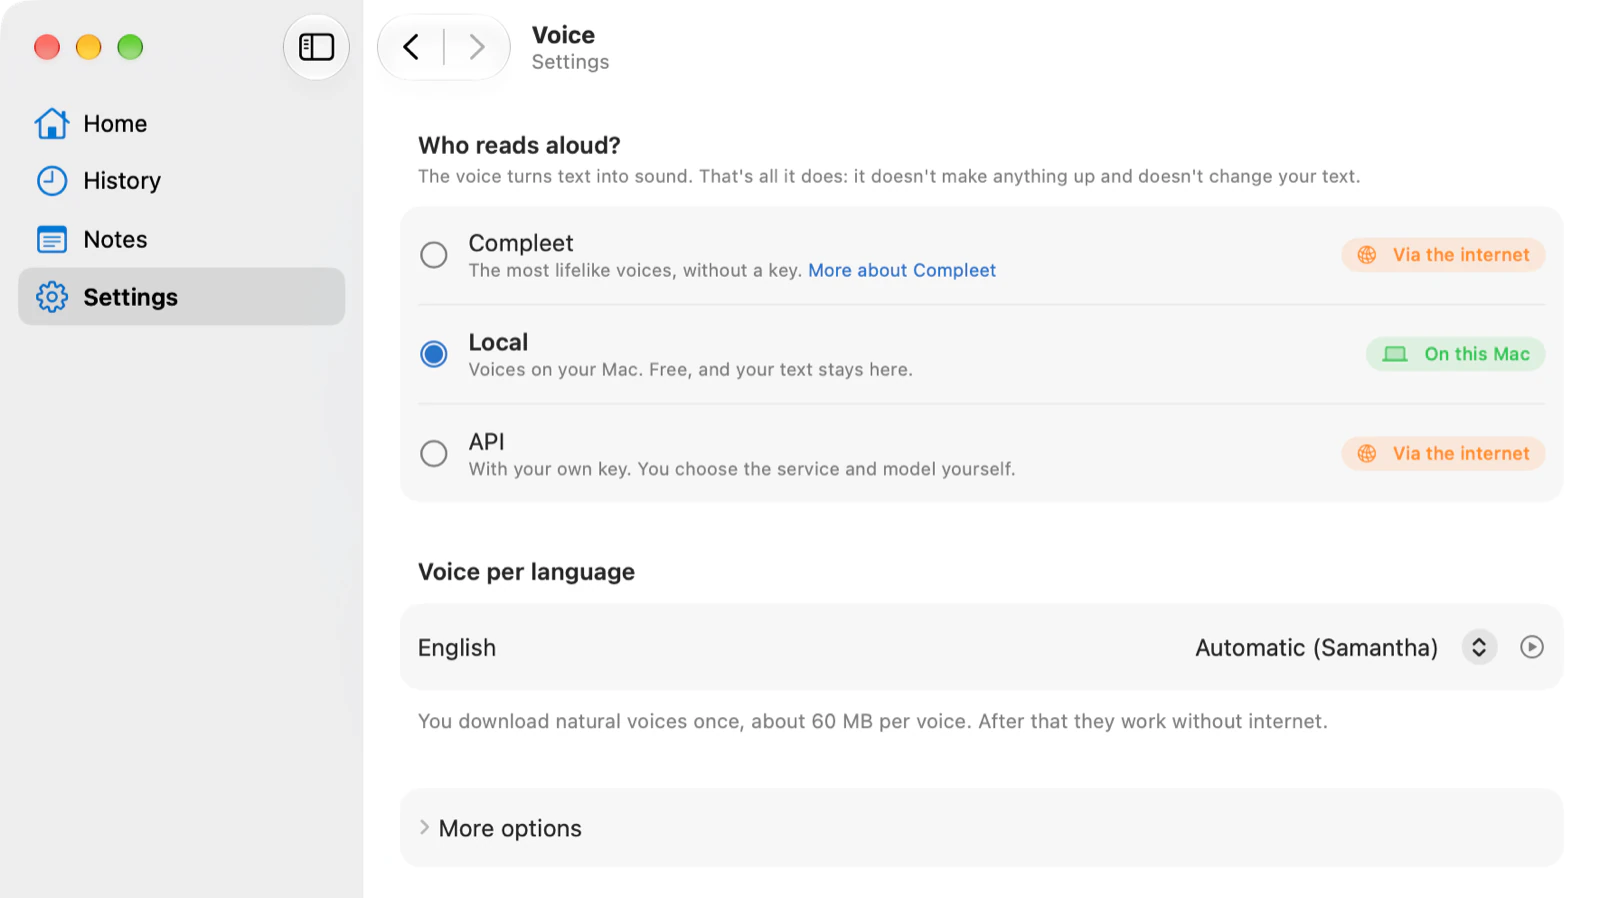
- On your own computer. The voices of Windows or macOS, and the natural Piper voices. Free and offline; a Piper voice is about 60 MB.
- With a key of your own. Google Cloud, with a free amount every month, and OpenRouter (Fish Audio, MiniMax and more). Your text then goes to that service; you paste the key under Voice.
- OpenAI and Google Gemini. Two more services with a key of your own. With Gemini you can also have a voice made from a description.Mac only
- Microsoft Edge. Free voices over the internet, no key needed.Windows only
- Compleet. At the top of Settings you find Compleet: one subscription for the best voices and AI, without keys of your own. It cannot be activated in the app yet.
- Clean up text. Clean up text before reading it aloud has an AI tidy the recognised text first: recognition errors and typos out, links and code as ordinary words, lists as sentences. Off by default; on Windows it is under AI for tasks, on a Mac under Clean up text. If a number, amount or date no longer matches afterwards, you hear the original text.
- Pronunciation. Settings › Pronunciation and own words: have an abbreviation or name pronounced the way you want. What you see stays the same; only what you hear changes. A web address is read as (link).
- Own words. On the same page you open two lists: eigen-woorden.txt for names and jargon that Speakybara must never correct, and english-words.txt for words that should always sound English.
Languages
The app and the reading work in 35 languages.
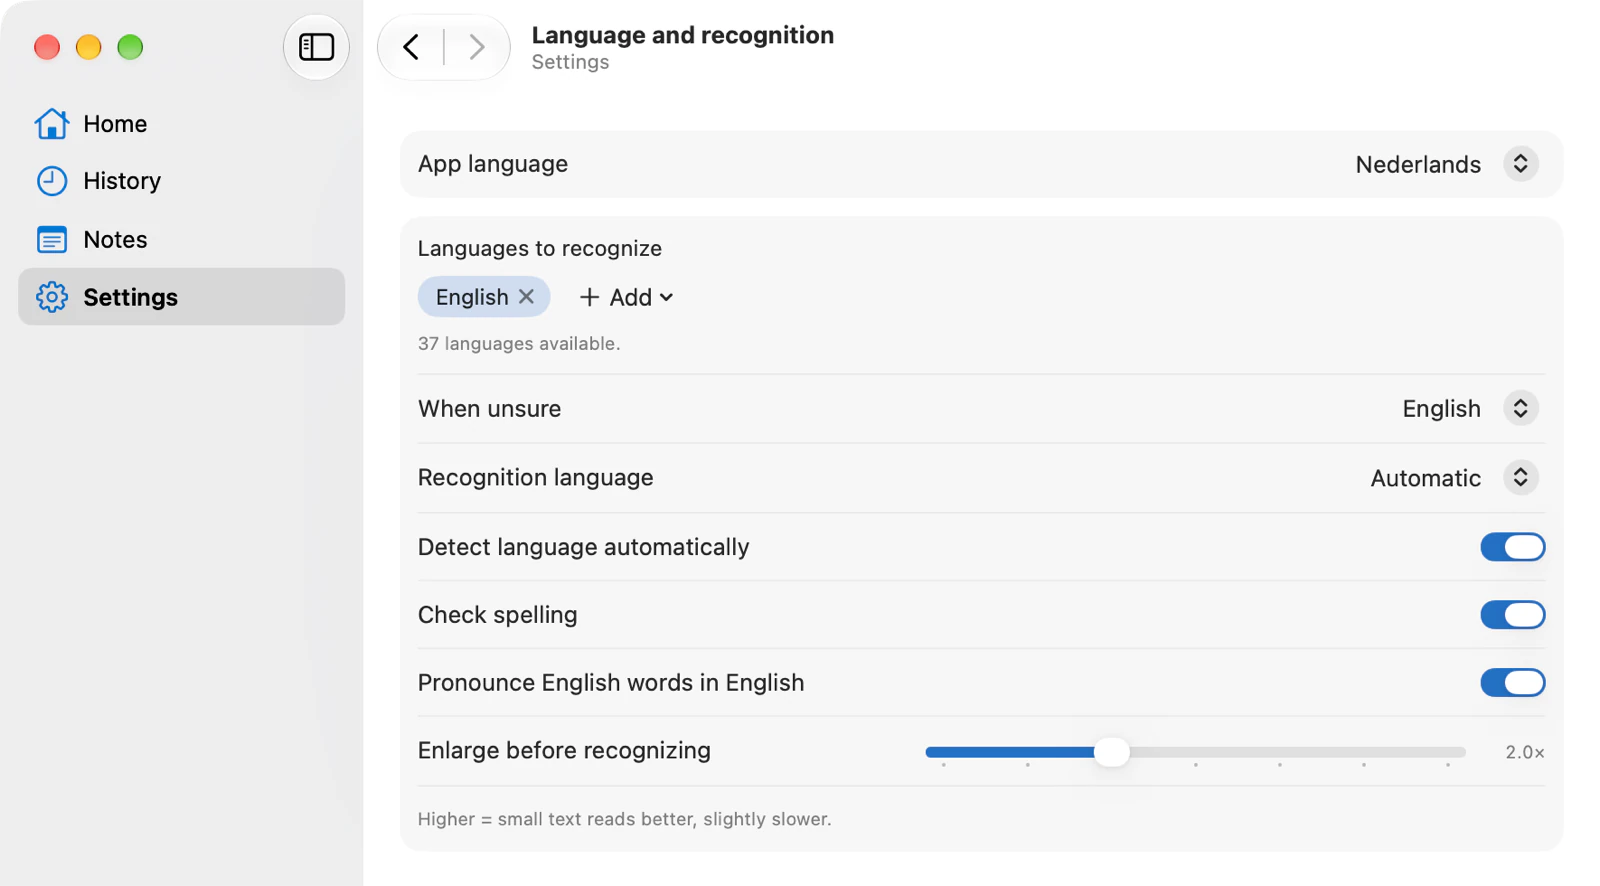
- Language of the app. Settings › Language and recognition: like your computer, or a fixed language. On a Mac it changes after a restart.
- Language of the text. Speakybara detects which language a text is in and picks the voice that goes with it. Choose which languages are on, a fallback for doubtful cases, or fix recognition to one language.
- Not from the screen. Hebrew, Hindi and Tamil (and Thai and Vietnamese on Windows, Greek on the Mac) cannot be read from the screen. Copy the text and use Read clipboard.
- Explanations in your language. Word meanings and explanations come in the language of the app.
Privacy
Text recognition always happens on your own computer, and the screen image stays there unless you turn on Explanations may look at your screen. Only an online voice or AI that you choose receives the text.
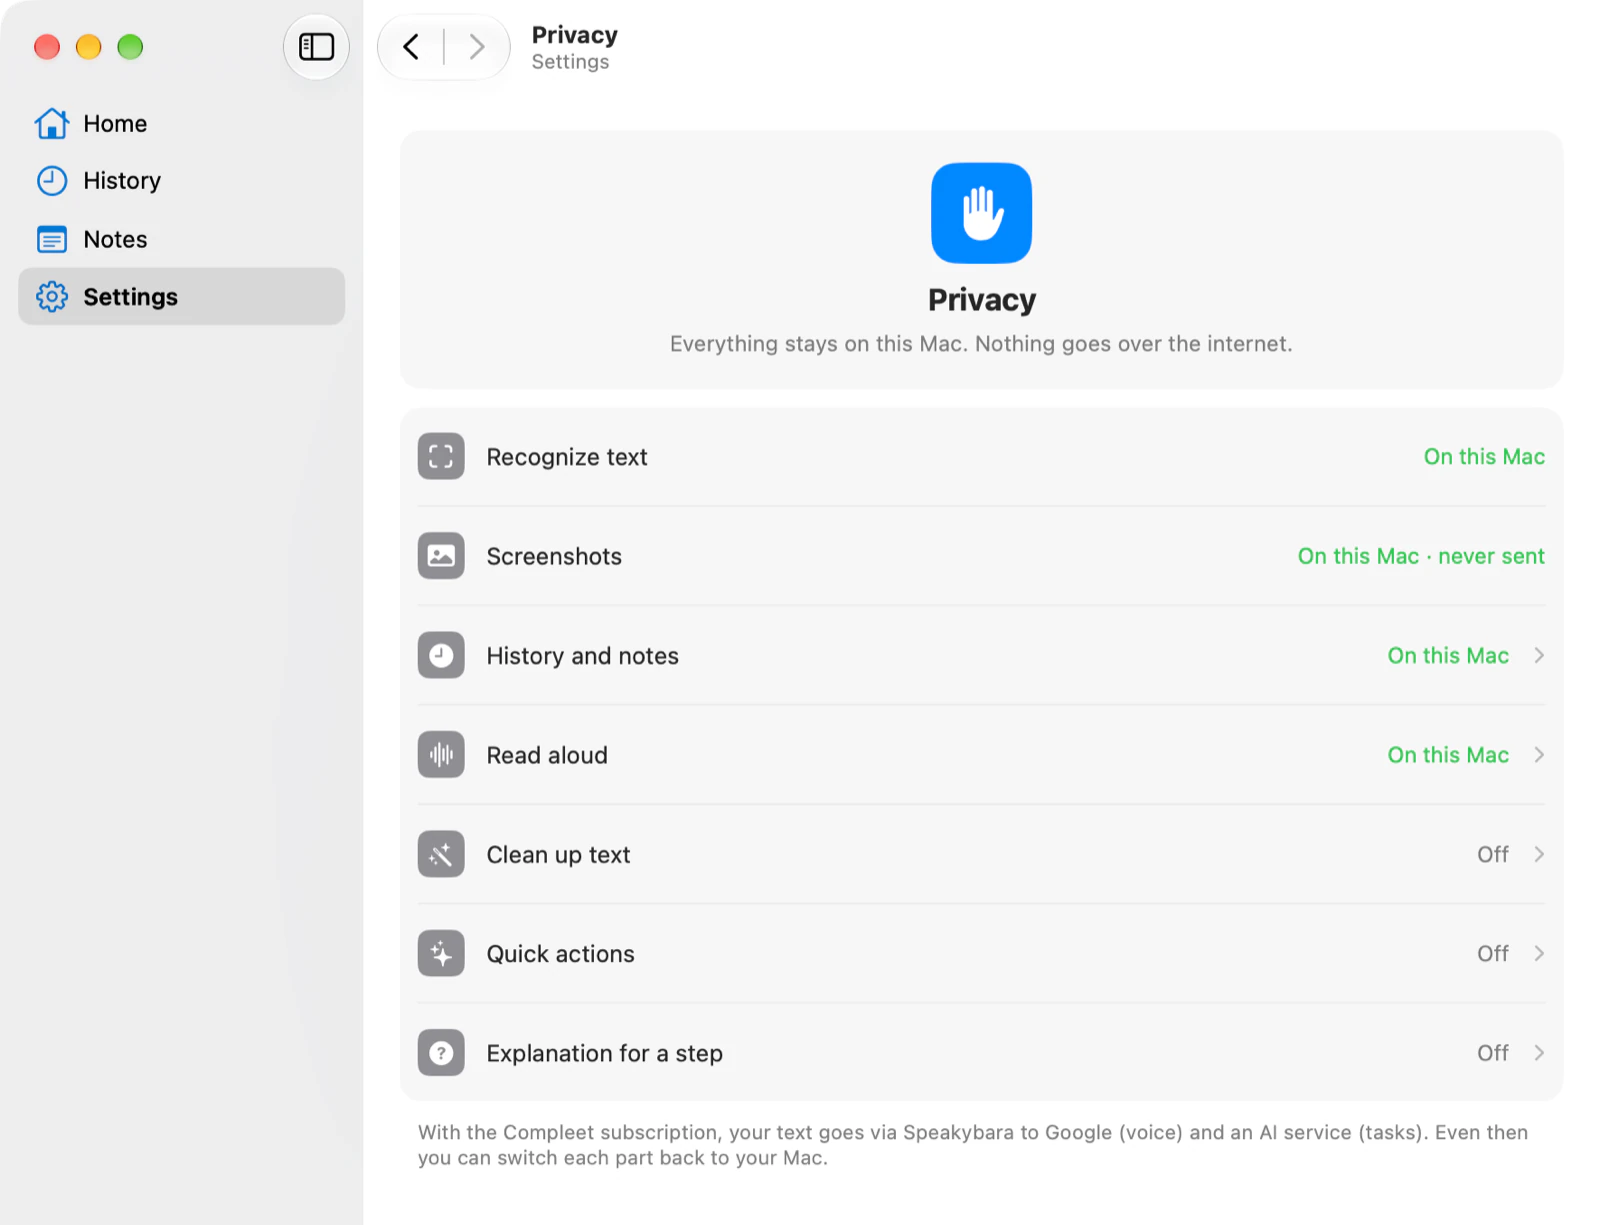
- The Privacy page. Settings › Privacy says per part whether it stays on your computer or goes over the internet, and to which service: recognition, screen images, history and notes, reading aloud, clean-up, quick actions and explaining a step.
- Keep everything on your computer. Keep everything on this PC (on a Mac: Keep everything on this Mac) switches to a voice on your computer and turns AI for tasks off. Your keys stay saved.
- History. History and notes stay on your computer only.
Mac and Windows
Both apps do the same and look the same. These are the differences:
- Keys and icon. On a Mac, Ctrl is Control (⌃) and Alt is Option (⌥). The icon sits in the system tray on Windows and in the menu bar on the Mac.
- Only on Windows. Microsoft Edge voices, turning other apps down while it reads, a frame across two screens, and Focus (Ctrl+Alt+F), where the window shows only the text.
- For now only on the Mac. OpenAI and Gemini voices, making a voice of your own, a page of its own for Clean up text, adjusting the built-in quick actions, copying and selecting in the subtitle bar, and Control+Option+B.
- Word meanings without AI. The Mac then uses its own dictionary; on Windows you need an AI for it.
- Which Mac. macOS 14 or newer, with Apple silicon (M1 or later). The Mac version is still a test version.
Last checked against the app on September 29, 2026